Wednesday 30 October 2013

Shaping The Aircraft Carrier!!


The moment has arrived where the ship begins to take shape and from the previous post the shop will take on the shape of a Japanese crane slightly. (See previous post for details).

To begin with the bottom of the ship was been patched up using the bridge tool from the line selection in editable poly mode. This will then give the base to shape the bottom of the ship and simple pulling with the points in editable poly mode again and adding some more sections using the swift loop tool allowed for the base of the ship to take shape as shown below which the curve towards the front end of the ship is most important.  


From this the front end of the ship was just extruded and bevelled out using the face selection in editable poly mode to form the head part of the Japanese crane and adding more swift loads on the head section will allow for more editing making it easier for the head of the crane to be more rounded instead of pointy.

From here the back of the ship was next to be modelled because although the ship can lift it can’t really go forward so some jets on the back should just about sort that problem so a back engine  was formed simple extrusion to make a large fantasy based engine. At the very end of the engine a slight extrusion inwards was done so the jets of the engine could be placed within the engine.


Next the wings need to be created and although making crane wings would be a great addition to the model it would take too long and time isn’t really on the groups side for this project so just normal jet wings will have to do for this particular project. So basically from the images below the side of the ship has been extruded out in stages to form the wing and simple movement of the points to help shape the wings was in editable poly mode.


Now the back to the rear end of the ship the jets can now be created and placed appropriately within the given space and the cylinder object was simply bevelled and extruded to for the jet like shape. Also different types of jets where created to add interest to the model.


Now the engine is complete the wings need more attention so that further detail can be added to them. So although the wings aren’t crane like adding some gaps won’t look too bad so adding some swift loops to the wings so that these gaps can be added. The gaps where made just editing the swift loops using the point in editable poly mode. See picture below for example.

Wednesday 23 October 2013

Before the model can take shape!!

Before the model is continued and begins to take shape a thought process should go into how this model will be shaped, apart from the final project being fantasy based which was agreed in previous weeks this give the model more freedom into what it should look like as long as it has relation to its intended purpose so some research went into something rather unique but inspiration had to come from the original source and in this case its japanese battle ships and aircraft carriers. The Aircraft carrier called Shokaku came into interest not because of how the aircraft actually looked as the image below shows.


The thing that really became of interest from this ship is the english meaning which is 'Happy Crane'. This piece of information was particularly useful because since the project is fantasy based this then allowed for the ship which hasn't really taken on any shape to have a purpose and a meaning behind it. so basically the ship which is being created can be shaped as a crane in some way so that the ship has a meaning towards the japanese which can be explained and make sense into why the aircraft carrier was created.


since some inspiration has been acquired the next stage is what in particular parts should be implemented onto the model of the ship that have a relation to the japanese crane, from the images above you can see that there is not much to the crane that could be used as a symbol for the aircraft carrier, so further thought went into how this could be a success without making a completely irrelavant model. 

Another idea emerged from a previous film which is called the 'Avengers Assemble' which contains a flying aircraft carrier and its slightly different from other aircraft carriers because the control post is within the ship which gave an idea to this ship in similarity to this which is to have the front of the model as the head of a crane which will contain the command post for the aircraft carrier and some extra wings can be added to the model which wont be like crane wings but will make the model look as if its a bird.

from this thinking process now the model can be shaped so its fantasy based but has a meaning and purpose which is explainable and can be unique towards the project but still fit into the story line without going of the topic, further more since the aircraft carrier is part of the japanese side of the war and fantasy like this ship is perfect if shaped well enough.

before this post is concluded another important element which needs to be taken into account is that although this is an aircraft carrier it still needs some sort of defence because it will be carrying the planes towards the enemy destination what will be its defence in the traveling stage of the attack, this idea came around because the ship would look rather plain and boring so having some sort of defence will not only be beneficent but it would also give some detail towards the ship and since this is no ordinary ship no ordinary detail can go into it so a collage of potential guns has been added below which could be used for the ships defence system while traveling to its set destination.


Tuesday 22 October 2013

The Fans!


The fans for the ship are an important element to the aircraft carrier which was discussed in the previous post for elevation reasons for the carrier. The fans will be placed in the middle of the wings so although size doesn’t matter an inaccurate fan would make the final outcome look weird and out of place.

The fan will have to be created using all four screens (viewpoint) of 3ds max for accuracy.

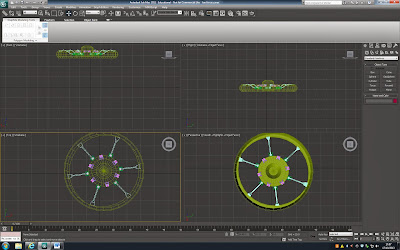
Since a fan is considered to have a round shape a sphere will be the first object to be used in 3ds max. Once the required size is acquired it needs to be squashed so by using the resize tool in 3ds max the sphere should be squashed down to a reasonable height and an image below shows what size was used for this project.


Now the fan needs to have a whole for the blades to rotate so by converting the sphere into an editable poly mode the faces of the sphere can be selected and deleted so that a smaller sphere is in the middle but still containing and outer shape for the rim of the fan. An example image is shown below and both sides need to be accurate and symmetrical to be able to continue.


Now the rim maybe squashed more that the inner part of the fan but this is not a problem and will be resolved but for now the inner part of the fan needs to be connected together and this can be done through the bridge tool making sure that the inner part of the fan has no holes.

Now if the outer rim is selected it can be raised slightly so that it’s easier to work from and the inner piece should also be raised, the inner piece should be raised so that the bottom of the inner piece is in line with the bottom of the outer rim. The outer rim should be pulled evenly using the resize tool so that the centre piece is now in the centre of the rim in size.


Now the centre piece can start taking shape with a simple extrusion upwards to a sort of cap or lid for shown in the example below with the top of the cap now being just over the top half of the rim in height.


Now the basic part of the fan has been created but more detail is required to give a more fantasy or advanced look so a box was formed into a rectangle and by using the swift loop tool more edges and faces were added for easier editing.


Then 2/3 of the box or rectangle now was deleted so that only a thin even rectangle remained. From here the  rectangle was squashed and reformed in editable poly mode to make sort of an upper layer to the fan for more detail.


Then a simple cylinder was used on the back end of this object so that it would be able to connect to something or the rest of the fan.


Then another cylinder was made and re-shaped using editable poly mode to make the final attachment of this object and simple extrusions and symmetry was used to create this which the images clearly explain below.


Before the object can be added to the fan a little inset needs to be included on the outer rim of the fan so that more detail can be added in certain places which the will involve some extrusion later on.


Now the object is complete it can be added to the fan and in this example resizing and rotating it appropriately to fit on the fan is shown and from there it’s a simple duplication around the fan to give the fan some of the detail it requires for this project.


 After the object is in place the top layer of the rim and the bottom are extruded out so the object is not stretched out too meet the rim which gives the fan more depth towards it and complicates the shape slightly. This is then duplicated across the whole area of the fan.


Now the fan is taking shape but a little more detail is required so a sphere was taken and reshaped the same way as the back end of the first object for the fan. With a slight difference to the back end of the new object and the image below shows the difference.


Another cylinder was taken and resized to fit in the gap of the now new piece of detail for the fan and is rotated and resized to fit on the fan like the example below.


From this the detail of the fan is complete so the last thing to do would be to add the blades for the fan and since there is enough detail to this fan so just simple fan blades but the bottom of the centre piece will have to be extruded slightly to allow for some space for the fan blades and the fan will now have different levels to it which will make it more organised.


Monday 14 October 2013

The Start of the Aircraft Carrier


This will be one of the models which will be used in the final project to show the events of pearl harbour except with a fantasy twist for the audience to use their imagination more. This will be a flying aircraft carrier which sounds slightly odd seeing as why is there a need for aircrafts to be carrying other aircrafts but since its fantasy based imagination will be the key to hopefully keep the audience interested in the animation.

This first post will be how the more basic shape was created and the detail will follow more in stages.

The first object used to shape the aircraft carrier was the “Box” object and a rectangular shape was formed and the key to creating the first basic shape is using all the 3ds max views at the same time so that accuracy can be achieved which is important for the final look of the ship.

The box was converted into an editable poly and more faces were added using the “Swift Loop” tool so that more faces and edges where available to help shape the carrier.

This particular carrier was shaped from the Akagi Aircraft Carrier used in the attack against Pearl Harbour so that although this is fantasy the original beginning shape came from the original source which may show that the Japanese evolved in this fantasy time.

This is the website used to obtain the top view of the Akagi Carrier which was used to make the basic shape of this aircraft carrier. The website address is below.


Once the shape is achieved it needs to be cut in half and one of those half needs to be deleted depending on which side is preferred by the user but it doesn’t matter because the symmetry tool will be used to acquire the other half of the ship.

Once half of the ship is achieved a wing should be extruded or pulled out of the back end of the carrier depending on the user’s choice but for this project it was pulled using the points element of “Editable Poly Mode”. Still using all four screens of 3ds max the aircraft carrier should look like this image below.


Now the extra extrusion from the ship is the next part of the ship because although the ship now has wings there is no explanation for how it would move forward or backwards and since it’s an aircraft carrier banking should be out the question because all the aircrafts on board will simply fall off.

Basically the extra extrusion is the shaping of jets for the bottom of the ship to help with simple direction.
This didn’t really look very fantasy or sci-fi so it was removed and a tail jet sort of thing was formed on the top side of the ship to give the ship more of a weird but appealable look.


The image below shows the full ship again with the symmetry so that an insight of the final outcome can be viewed.


This then lead to the question as the ship can now sort of move forward but how was it going to get in the air so the thought of using huge fans within the wings to give the necessary elevation would solve that particular problem so the wing the and the back end of the ship had to be corrected accordingly so that the fan would fit into the wing nicely and there was enough space on the bottom to let air through so the fans would work. The picture below shows the type of work which was carried which is basically straight forward in the wing being dragged to a higher level and a point being added so that the wing would have the required volume for the fan to fit in to the wing. The bottom half of the back end was just bridged across to cover the whole


Monday 7 October 2013

Research Boards 1

Planes from the Japanese
Japanese Aircraft Carriers
Pearl Harbour Attack


Gantt Chart


Research


Secondary Research!!!

For the purpose of this project no Primary research will be conducted due to time issues.


Medal Of Honor: Pacific Assault. 2004
This is game based on Pearl Harbor which is interesting because its from the soldiers point of view. Of course for a game this is supposed to show more emotion but this could relate to how we as a group go about completing this project and what sort of emotion should be shown in this animation.


Pearl Harbor 2001
This is a film which shows again the events of pearl harbor from different point of views but all from the American side, it shows things like how the Japanese achieved there surprised attack and how they did not send there last wave of planes to finish bombing pearl harbor because the element of surprise was compromised, by this point they had destroyed almost everything. This film has helped in how things like slow motion or close ups can show different emotions that could be experimented in this project.


Tora! Tora! Tora! 1970
This is an older version of Pearl Harbor but also showed more of the attack on the Japanese as well which helped in how we as a team would go about making the Japanese attack pearl harbor for our project.


XMEN world Class 2012
This film didn’t educate more on pearl harbor but gave the idea that the beginning of the animation should show some of the countries fighting in the world war and this could be represented by bombs flying from one country to another. This would be more informing on what the animation will show and also the element of conflict would be evident.


List of ships and Planes used in the Pearl Harbor attack.